What’s on this page?
- Creating a Campaign
- Survey Links
- Campaign Settings
- Quotas
- Pausing and Closing a Campaign
Creating a Campaign
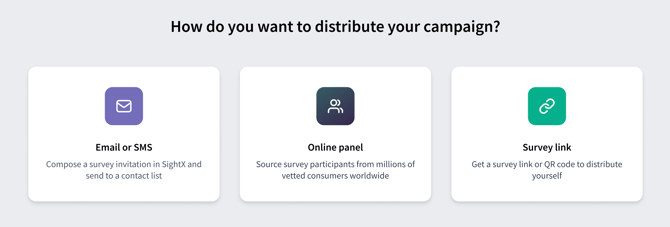
To distribute your survey to respondents, you’ll first need to create a Campaign within your project. A campaign is a way to group together respondents/responses; each campaign has a unique survey link, quotas, language, and outreach method. You can also use separate campaigns for various waves of a survey. To create a campaign, navigate to the Distribute tab in the side navigation menu. Click on the “New Campaign” button in the top right corner of the page to create a new campaign.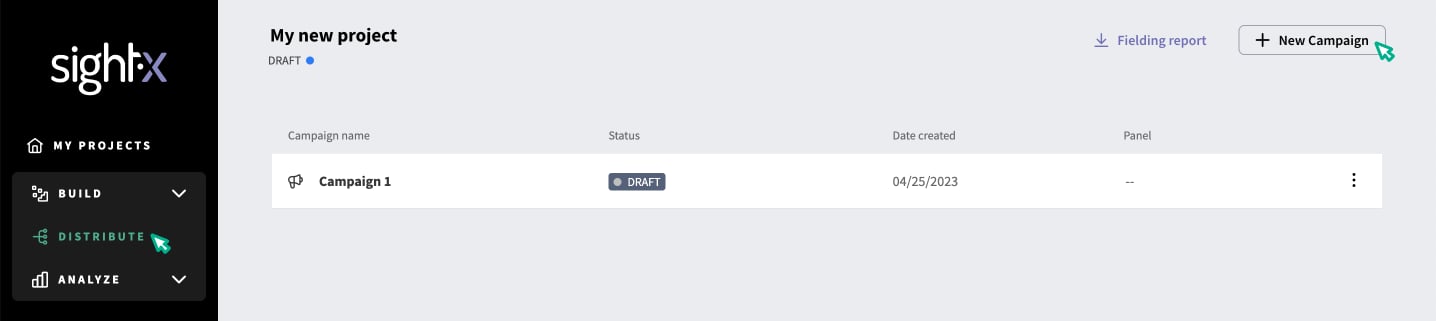
Survey Link Campaigns
To obtain your survey links, navigate to the Links page using the left hand navigation menu. Here, you’ll see a Test link, a Public link , a Public QR code, and an Administration Mode link.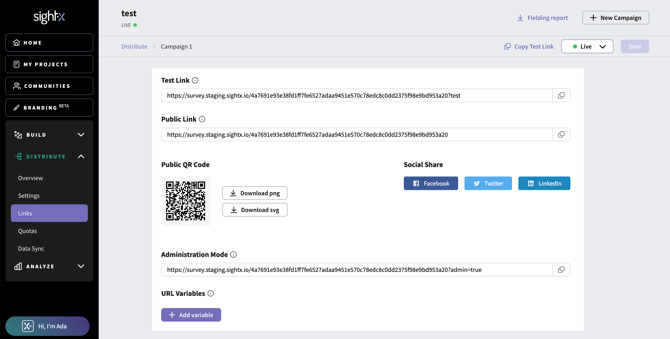
Campaign Settings
On the settings page, you can rename your campaign, or make other configurations changes. If you make any changes, be sure to click theSave button in the top right corner.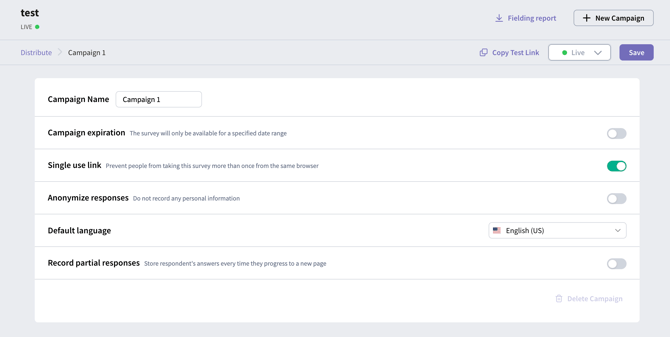
Quotas
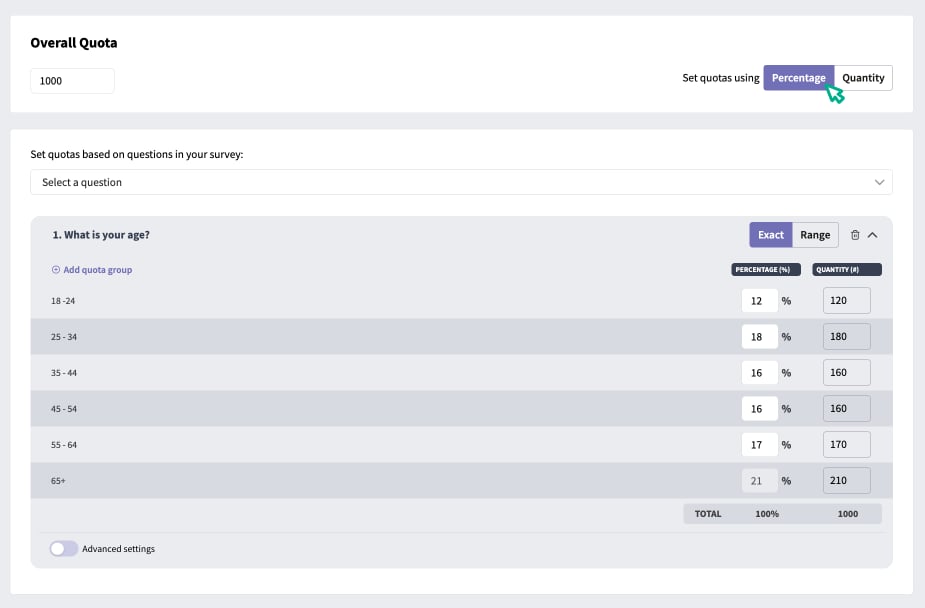
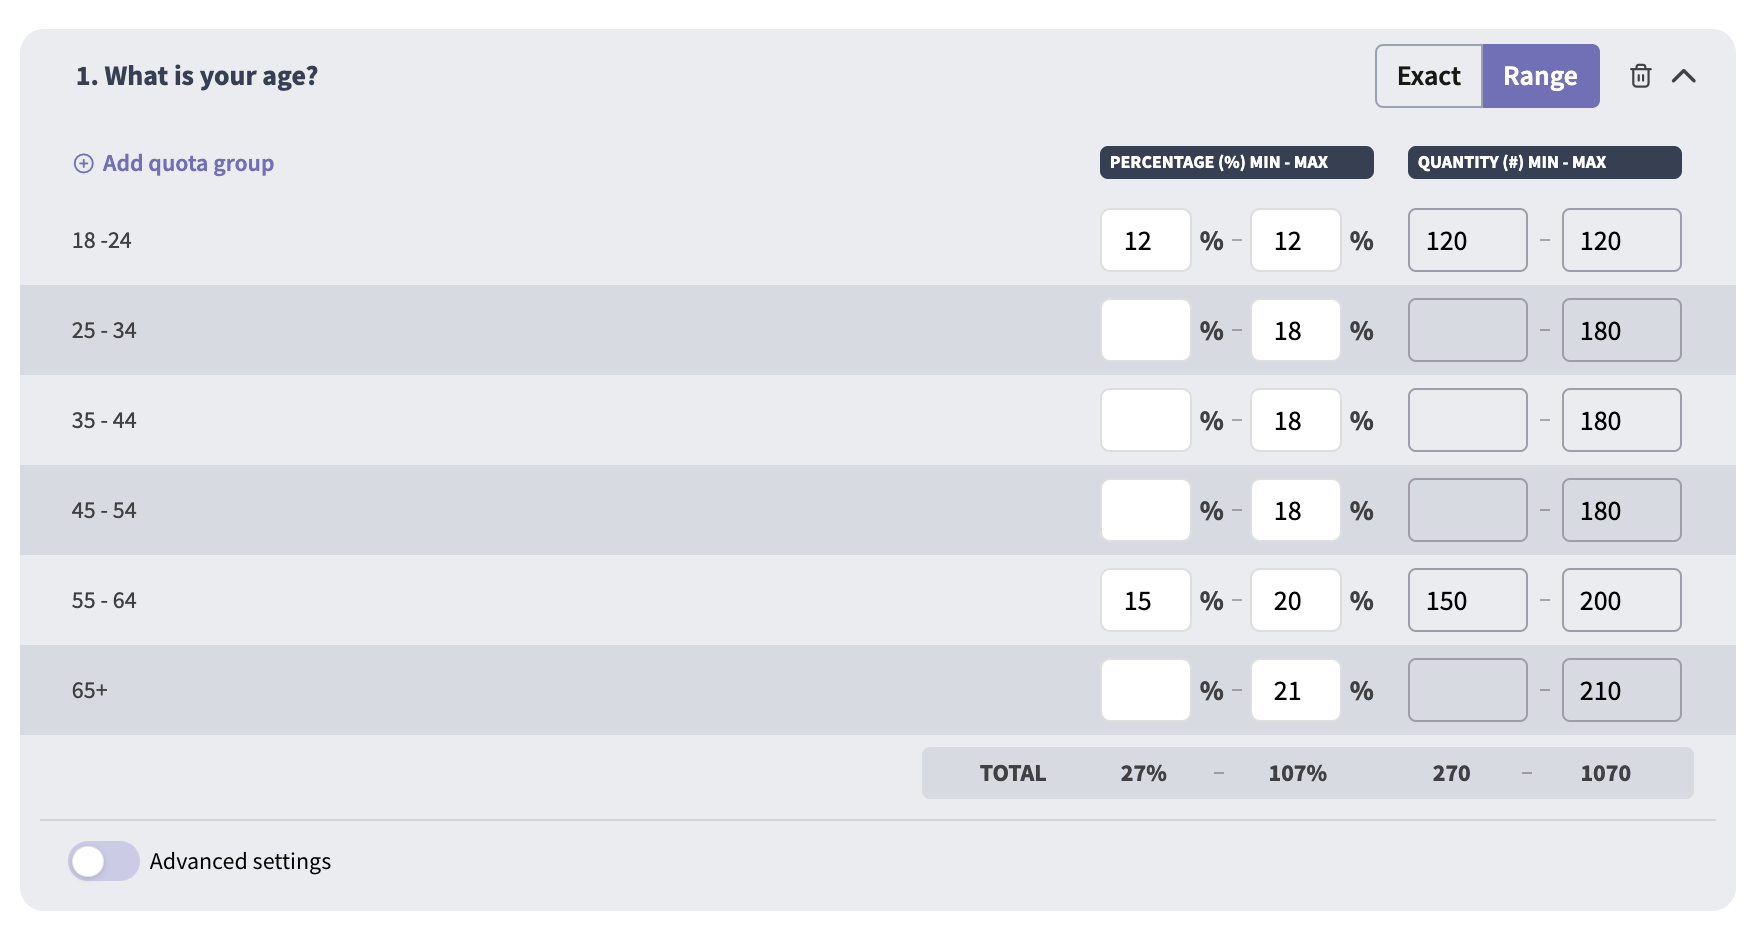
To set a limit on the number of responses you want in your survey, or to set limits on respondents from particular groups based on their answers to survey questions, you’ll need to set up Quotas. First, navigate to the Quotas page in the left navigation menu. You’ll see a space at the top of the page to enter the total number of respondents you want to participate in your survey, called the Overall Quota. After you enter the number of respondents you’re looking for, you’ll be able to set limits on respondents based on their answers to questions in the survey. To set a quota on a question, find the question you want to set quotas on in the dropdown, and click “Add quotas”.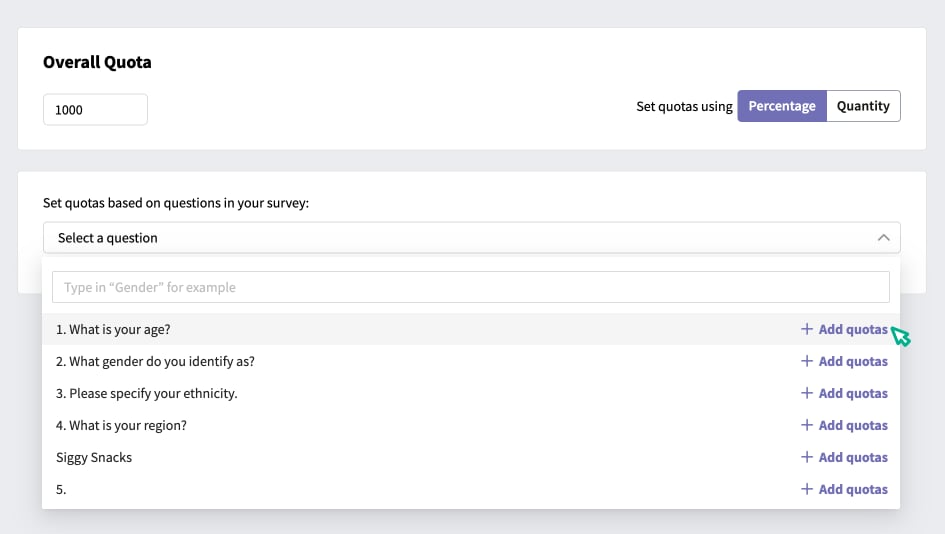
Pausing and Closing a Campaign
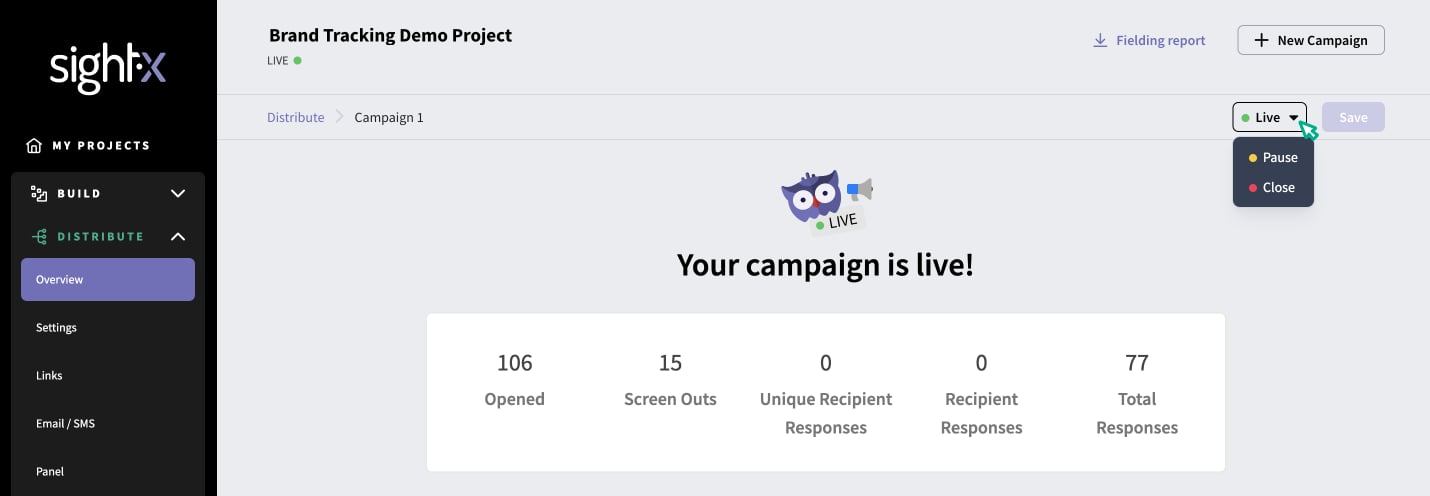
While a campaign’s status is “Live”, respondents can access the survey. If you want to pause access to the survey, you can pause the campaign by changing the campaign status in the header of the campaign page.